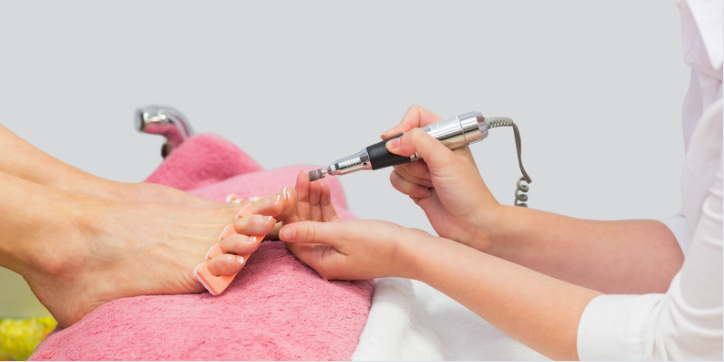
Are your feet in need of some care? In this guide, we’ll uncover the secrets of DIY callus removers and the convenience of waterless pedicures. Say goodbye to rough feet with simple, effective solutions you can make at home. Let’s embark on a journey to happy and healthy feet, exploring the latest trends and directing you to waterless pedicure services near you.
DIY Callus Removers: Unveiling the Magic
Common Ingredients in DIY Callus Removers
- Epsom Salt Soak: You can combine warm water with Epsom salt for a relaxing foot soak. As a matter of fact, Epsom salt helps soften calluses and soothe tired feet.
- Baking Soda Scrub: Also, you can even create a simple paste using baking soda and water. Then gently scrub this mixture onto your calluses to exfoliate and soften the skin.
- Lemon and Sugar Scrub: Furthermore, you can also mix sugar with lemon juice to form a scrub. The sugar exfoliates while the acid in the lemon helps break down tough skin.
- Oatmeal and Olive Oil Mask: Blend oatmeal and olive oil into a thick paste. Then apply this mask to callused areas for a moisturising and exfoliating treatment.
In essence, the key is to experiment with various combinations to find the DIY callus remover that best suits your skin type and preferences.
Crafting Your DIY Callus Remover
- Step 1: Choose Your Base
Firstly, begin by selecting a base ingredient such as Epsom salt, sugar, or oatmeal, depending on the level of exfoliation your calluses need. This is because choice of base sets the foundation for your DIY callus remover, ensuring it aligns with your desired level of exfoliation and skin sensitivity. - Step 2: Add Liquids
Secondly, introduce liquids like water, lemon juice, or olive oil to create a paste or scrub consistency. As a matter of fact, the liquids enhance the mixture’s texture and contribute to the overall effectiveness of the callus remover. Additionally, the addition of liquids not only binds the ingredients together but also introduces additional benefits, such as hydration and skin-nourishing properties. - Step 3: Customise with Extras
Furthermore, you can enhance your DIY callus remover by incorporating extras like essential oils, which offer fragrance and potential therapeutic benefits. Also, the popular choices include lavender, tea tree, or eucalyptus oils.
Moreover, customization allows you to tailor the scent and additional benefits of your DIY callus remover, making it a personalised and enjoyable foot care experience.
Application and Results
Lastly, once your DIY callus remover is ready, apply the mixture to the affected areas of your feet. Gently massage or scrub, focusing on callused areas. Finally, rinse thoroughly and moisturise afterward for optimal results.
Crafting Your DIY Pedicure Sanctuary
Now, let’s turn your home into a spa-like haven. Short on time? No problem. With DIY pedicure hacks, you can pamper your feet in minutes, leaving them soft, smooth, and ready to conquer the day. Follow this step-by-step guide to recreate the spa-like experience in the comfort of your home, ensuring a pampering session without the need for water.
- Step 1: Prep Your Feet
Firstly, begin by removing any existing nail polish and trimming your nails to your desired length. Use a nail clipper and a nail file for shaping. - Step 2: Soak-Free Exfoliation
Secondly, unlike traditional pedicures, a waterless approach means no soaking. So instead, opt for a gentle exfoliation using a foot scrub or pumice stone. Then focus on areas prone to roughness, like the heels and sides of your feet. - Step 3: Cuticle Care
Apply a cuticle softener to the base of each nail, allowing it to sit for a few minutes. Then gently push back the softened cuticles using a cuticle pusher or an orangewood stick. - Step 4: Moisturise and Massage
Moving on, choose a hydrating foot cream or oil to moisturise your feet thoroughly. Now follow this with a relaxing foot massage, paying attention to pressure points and tension areas. - Step 5: DIY Callus Remover
For addressing rough patches, apply your DIY callus remover, targeting areas that may need extra attention. This step is crucial for achieving the smooth, soft results associated with traditional water-based pedicures. - Step 6: Nail Care and Polish
Finally, once your feet are prepped and pampered, it’s time for nail care. Then apply a base coat, your favourite nail polish, and a top coat for a professional finish.
.
Finding Waterless Pedicure Services Near You
Looking for a professional touch? Always make sure to look for specialist waterless pedicures near you. Speaking of experts, let’s shine a spotlight on the Bucksfoot Clinic. Renowned for our dedication to foot health, our clinic stands as a guiding beacon for those seeking professional advice.
Conclusion: Happy Feet, Happy You
In conclusion, you can implement these simple DIY pedicure tricks for rough feet and maintain good foot health. So, step into the realm of foot care, and let the journey to happy feet begin! Bucksfoot Clinic stands as your trusted ally, combining professional expertise with your at-home care routines. Visit our website to learn more.
FAQs
How often should I use a DIY callus remover?
Once or twice a week is ideal. Adjust based on your feet’s needs.
Are waterless pedicures suitable for sensitive skin?
Certainly! Many waterless options cater to sensitive skin, ensuring a gentle and effective experience.
Can I combine DIY care with professional services?
Absolutely! Bucksfoot Clinic recommends a balanced approach for optimal foot health.
Are waterless pedicures as effective as traditional ones?
Yes, They offer the same benefits without the water waste.

